Pages

Sunday, October 23, 2011

Fabulous Florets

This card uses the Fabulous Florets stamp set from the "Beyond the Garden" suite from Stampin' Up. It coordinates with the Designer Series Paper and two other stamp sets. Can I just tell you how much I LOVE this suite?


Recipe:
Cardstock: Old Olive, Crumbcake, Whisper White & Night of Navy
Ink: Old Olive & Night of Navy
Stamp Set: Fabulous Florets & Short and Sweet
Punches: Modern Label, Word Window, Scallop Oval & Scallop Edge Border

Here's what everything in the "BEYOND THE GARDEN" suite looks like:

Ornate Blossom

Fabulous Florets

Friends Never Fade


Designer Series Paper

To order any of these products or check out ALL of the Stampin' Up products click


Happy Crafting!


Friday, October 21, 2011

Holiday Treat Box

Today I'm sharing with you some Christmas gift bags! I made these cute little guys from a tutorial at my FAVORITE crafting website - and I'm going to share it with you here:


I made these 2-5-7-10 Boxes and embellished them with tags, paper images and bling! I filled them with little chocolates. Sorry for the picture quality - but you get the idea.


Happy Crafting!

Thursday, October 20, 2011

For Everything

Ok so here is a very simple card. But just so darn cute. This is what I call a "Quick and Easy" card. You can throw this card together within a few minutes and you're done! A perfect thank you card! It's original, handmade and from YOU! Who wouldn't love it?


Recipe:
Cardstock: Crumbcake, Whisper White and Baja Breeze
Ink: Baja Breeze, Cherry Cobbler and Pumpkin Pie
Stamp Set: For Everything
Ribbon: Pumpkin Pie 
Punch: Decorative Label Punch

There are so many things you can do with this stamp set! I love it!
You can get it here:


Happy Crafting!


Wednesday, October 19, 2011

Christmas Stocking

Stampin' Up just came out with a Christmas stocking die - can you say ADORABLE?!
You can actually "stuff" your stocking - imagine candy canes sticking out! What a fun gift!

I embossed the white stocking parts to give them more texture and a pattern. I attached a "NOEL" tag with coordinating punch that pops it right out! Added some snowflakes, a red button and a little glitter! So festive, it gets me in the Holiday spirit! This is a project we will be making at an upcoming class.

Here's the recipe:
Cardstock: Real Red, Whisper White & Old Olive
Stamp Set: Warmest Wishes Hostess Set
Ink: Old Olive
Punch: Decorative Label
Bigz L Die: Holiday Stocking
Sizzlits Decorative Strip Die: Northern Frost Snowflakes
Embossing Folder: Vintage Wallpaper
Accessories: Designer Buttons (Brights Collection), Hemp Twine, Gold Stampin' Glitter


These products can be ordered below:


Happy Crafting!


Tuesday, October 18, 2011

Wedding Wishes

A friend from Santa Barbara asked that I make her a few Wedding Cards. 
Here's what I came up with!


Products Used:
Cardstock: Crumbcake, Very Vanilla, Black & Rich Razzleberry
Stamp Sets: Bliss, Best Friends Forever & Swirls and Curls Verses
Ink: Black, Rich Razzleberry and Versamark
Ribbon: Very Vanilla, Black and Rich Razzleberry Satin


I LOVE the Rich Razzleberry color! It comes in the Ink Pad, Cardstock, Ribbon and Marker!
 It is part of the BRIGHTS color collection!


To order these products, click on the Stampin' Up Catalog to your RIGHT!
OR here:


Happy Crafting!


Monday, October 17, 2011

Scrappin' did Happen

I'm working on my daughter's baby album. She's almost four and I decided I better get crackin' on it. Here's a page I made - which really isn't my style but I went for it. I usually like to pack on as many pictures as I can, but this one picture of me and Toryn was meant to stand alone . . . . 

Sunday, October 16, 2011

Petal Cone Treat Pennant & Basket

The holidays are just around the corner and now is the time to start making a list of everyone you want to acknowledge this Christmas season. The Petal Cone die is a FABULOUS way to make a quick and thoughtful basket you can fill with any kind of treat and give to friends, neighbors, co-workers ANYONE without breaking the bank while still giving a handmade, heartfelt gift.

I made the pennant cone basket by simply running the die through the Big Shot and added a matching handle, and adorned with a snowflake stamp, scallop punches and flag cutout that comes with the Petal Cone Die. The basket was made with the same die except that I cut off the last 1" and scored at the bottom 2" and folded them in to create a flat bottom. I adorned with a white ribbon bow, a red "lolly" flower and a small stamped image with glitter framing. Viola! So easy, quick and fun to make! I can't wait to give these away!

This is the AMAZING Big Shot Machine!

Petal Cone Die

To order the Petal Cone Die and the Big Shot Machine click here!


Happy Crafting!


Saturday, October 15, 2011

Howl-loween Cards

Last night was our Halloween Card Class! For three hours we sat around making great cards, fun friends, and lots of memories!  We had a blast! Here's what we made: 

Kits for these 4 Halloween cards are $20 - this includes all pre-cut paper, images pre-stamped and all the embellishments! You do the fun part - assemble and enjoy!
 Email me and I'll get them out to you (free shipping!)

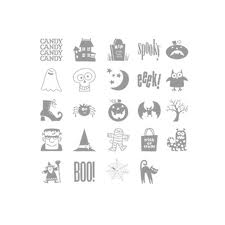
From the Crypt


House of Haunts


Spooky Bingo Bits

From the Crypt and Spooky Bingo Bits Stamp Set and ALL the cardstock used can be purchased at my website 24/7! Happy Crafting!


Friday, October 14, 2011

Flower Power

I love pink flowers! October is Breast Cancer Awareness month and for my pink ribbon challenge, I made this card with a stamped image colored and shaded with a pink Stampin' Write marker, adorned with a pink bow and scallop bordered window!


Here's the recipe:

Cardstock: Certainly Celery & Pretty in Pink & Whisper White
Marker: Stampin' Write Marker Pretty in Pink
Stamp Set: Happiness Shared
Embossing Folder: Final Press (That's the cute flowery impression on the pink cardstock)
Ribbon: Pretty in Pink 5/8" Satin Ribbon
Punches: 1 3/4" Scallop Circle, 13/8" Circle, Small Heart & Small Oval 
(Can you tell I LOVE punches?)


Any of these products can be ordered 24/7 on my website:


Happy Crafting! Have a Wonderful Day!
Hugs,
Jess

Thursday, October 13, 2011

Spooktacular Halloween Cards

Tomorrow night I'm holding a card class and we will be making 4 Halloween cards. Here's a little sneaky peek at one of the cards!


I made these super easy pumpkins for display. 


Here's the recipe:

The pumpkin is made by cutting 12 strips of cardstock 8.5" x 1". Punch a small hole on both ends. Gather all the strips and insert a brad at one end. Now spread out all the strips on your table to make them look like a spoke wheel. One at a time, grab a strip and lift it up and round it over and keep adding a strip at a time so that they join and form the pumpkin shape. Insert a brad once all strips are gathered.

I made the little curly strips by cutting skinny strips of cardstock and winding them tightly against a pencil. Add a button to the center with "Mini Glue Dot". What a cute way to make centerpieces for your dining room table or to decorate any room!

Hello!

This is my very first blog post on my brand spankin' shiny new blog~! A place for me to share what I love - paper crafting! So many of you ask what I've been making and working on and so this is a place for me to share everything that I'm busy working on! You can also follow me at:

My Meet Up Group! If you're local - join me! I hold monthly classes! If you're not local - buy the kits!

My Stampin' Up Wesbsite - Buy products 24/7 or Host a Workshop and earn FREE stuff!

Now that I've gotten my advertisement out of the way - here are a few things I've been working on lately . . 


3x3 Mini Birthday Cards


The following are cards we are making at a few upcoming Stampin' Up workshops! If you'd like to get a bunch of friends together and make these super cute cards - FOR FREE - book a workshop with me! You can also earn FREE products at your workshop!